
There is a lot to be said for working from home. You can sleep in a little longer, pet your dog, put in a load of laundry, all of which are just a few steps away from your desk.
However, teaching from home can be tricky, especially when it comes to setting up a comfortable, practical and appropriate space from which to host live classes.
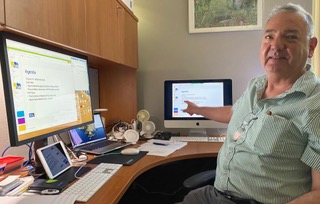
This is why I was excited when a colleague shared this photo from Richard Adams, a professor at the School of Graphic Communications Management. He had been in one of the Teaching Centre’s virtual drop-in sessions, and was inspired to take this photo to share his setup. The photo shows how he manages Zoom sessions — one computer to conduct the session, and another logged in as a guest so he can see what his students are seeing.
While this is a great tip, what interested me even more was having a glimpse “behind-the scenes.” This photo revealed what is all around Rich when he is teaching that his students likely never see (a notebook and a pen, a tablet and yet another computer). So, I am taking Rich’s lead and sharing my own space, along with some tips and tricks you can use to optimize your own teach-from-home setup.


Tip 1: Create a corner
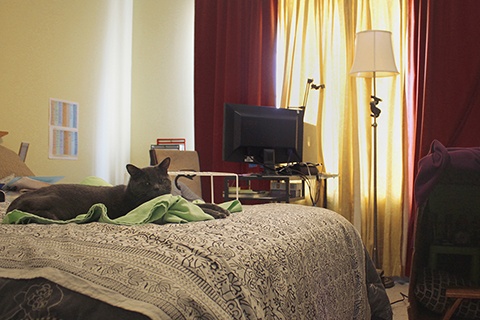
By placing the desk away from the wall, you can create a small corner from which to conduct live sessions. This minimizes how much participants can see of the room. My corner is in a guest bedroom that is a mess (complete with sleepy cats and my son’s blanket fort.) However, because of where I have placed my desk, none of that is captured on camera. The cats (and my son) no longer interrupt and distract me and my students while I’m teaching.
Also note that I have kept the wall behind me fairly bare. So far, there’s just a few reference charts I use in my day job that do not contain any private information.
Tip 2: Leverage lighting
Lighting can make a huge difference if you are sharing your camera during a class. It can also affect demonstrations you may be planning using a document camera or your phone (check out the recording of the Chalk and Talk workshop for more on this).
I have placed my desk beside the window, but most of the light is coming through the lighter curtains, which are slightly behind my desk. This means the light hits my face, not the back of my head (which would result in me appearing in silhouette). The light curtains also serve to diffuse the light, so it’s not too harsh or cause dark shadows. As the light changes throughout the day, I can shift the curtains to adjust, or turn on the floor lamp once it gets dark.
If you would like even more tips on how to look good on camera, check out this article by Gary Gould, a contract lecturer and production specialist with Toronto Metropolitan School of Journalism.
Tip 3: Find flexible furnishings
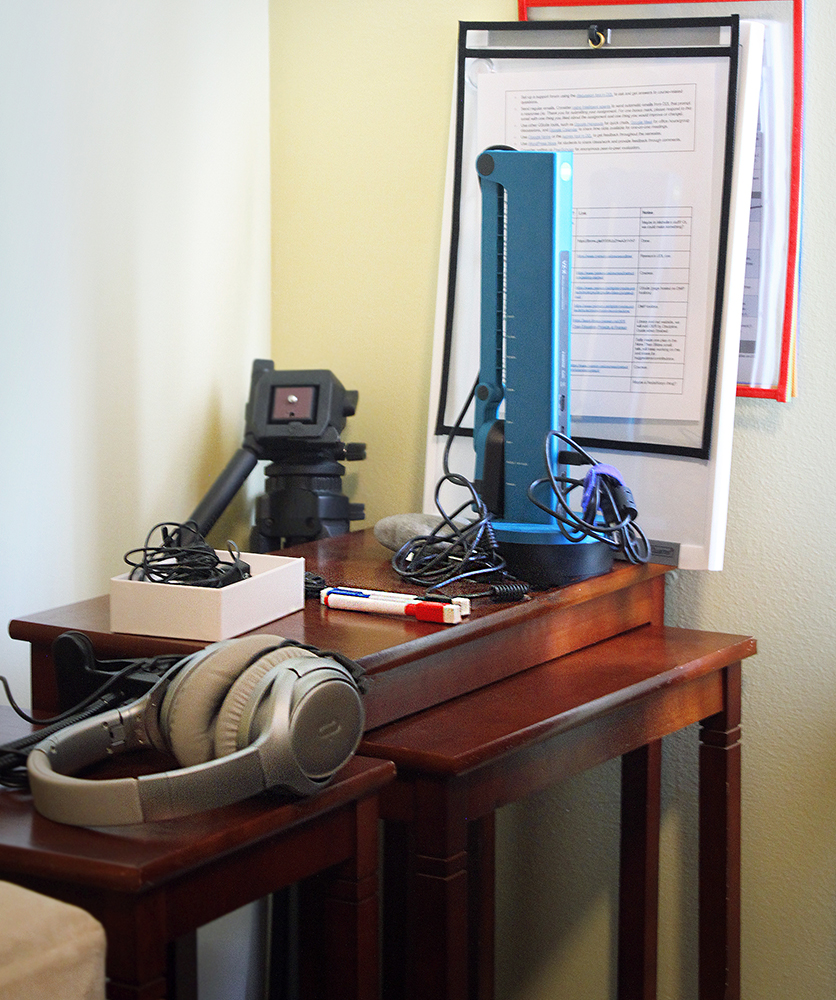
Keeping your supplies within arm’s reach, but out of view is handy, especially in a small space like my corner. I have stolen — I mean, repurposed — a set of stacking tables and a storage ottoman that I placed behind me. And bonus: the stacking tables can be used during demos, and then tucked back when not in use. I also use the bed right beside me to layout lesson plans, the textbook and even more demo space (more on that later.)
In addition to the storage ottoman, I also have secret storage in letter trays under the bed. If you are lucky enough to have a dedicated office with a proper desk, you probably use desk drawers. In which case, you can ignore my secret storage tips.
Tip 4: Keep essentials ready
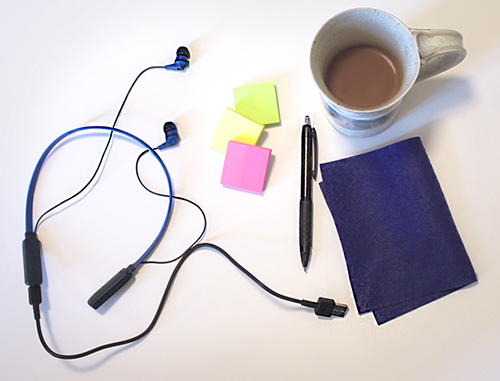
Avoid the mad scramble to find a pen, and keep supplies that can make hosting a live session easier nearby. For example, you can write small reminders on post-its and stick them on the edge of your computer monitor.
I like using a Bluetooth headset with built-in mic so I can move around while teaching and still be heard. However, the last time I hosted a workshop, I forgot to charge the headset. I now have a charging cable at my desk (and a post-it on my monitor to remind me to plug in the headset). I also have a piece of felt I can use to wipe off a white board, get rid of fingerprints on my phone, or quickly clean up a coffee spill. Maybe I should have more than one piece of felt…
Tip 5: Add a screen
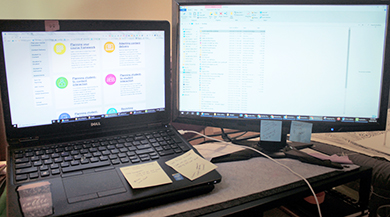
If you have a laptop, and you have the means to purchase or acquire a second screen, I would highly recommend it.
I often use one screen for work, and the other for reference materials. During a Zoom call, you can see the gallery/grid view, the chat and your slides all at the same time. Like Rich, you can add another computer (or a tablet or phone) for even more flexibility.
A related tip: with your Zoom account, you can join a meeting from multiple devices, as long as they aren’t the same kind of device (so only one computer, one phone, etc…).
Tip 6: Combine high tech with low tech
As I mentioned in Tip #5, you can connect to a Zoom meeting with the same credentials on two devices. One way I like to leverage this feature is to use my phone as a document camera. The challenge I found was how best to “mount” the phone above the document/demo space. I tried a flexible tripod, and then a special hinged mount specifically designed for this purpose. But, in the end it was a wire kitchen shelf that did the trick.
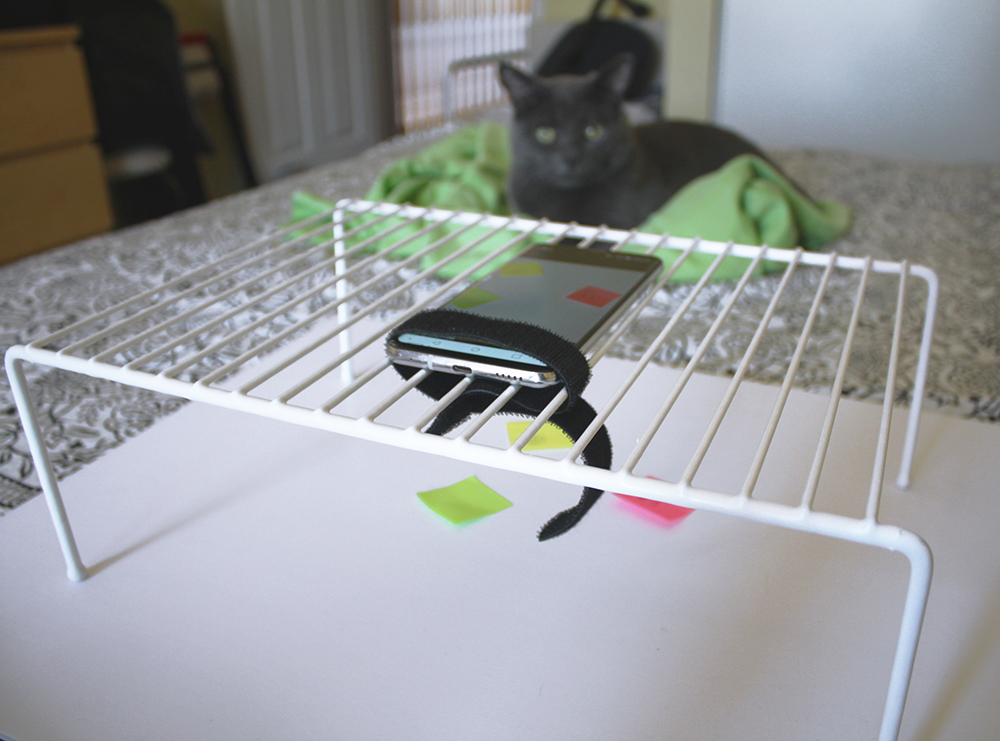
The photo above shows how I am using the bed in the room as a demo space/document camera. A velcro strip is holding my phone in place. I added a white foam core board underneath the shelf to create a clean, less distracting background and used the post-its to put key concepts on the board. In addition to post-its and documents, I also plan on digging out the lego figures from the basement and finding other objects now that I have this setup. So many possibilities!
Sometimes the easiest and most effective solution uses something you already have. Lift your monitor with a stack of books rather than buying a special riser, or position your desk to take advantage of the light from a window. Walk around your home and rethink the objects around you as possible teaching tools. It doesn’t have to be fancy.
Tip 7: Move while teaching
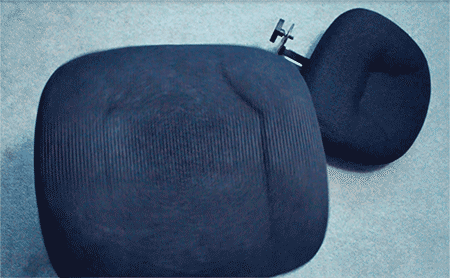
Coming up with creative ways to demonstrate course content is wonderful. The speed bump for me was finding a way to use my demo setup while having easy access to my laptop. My solution ended up being another simple one – I took the back off an office chair and now I have a task chair similar to the ones used by architects. I can spin around as needed. Maybe for you, the answer is to use a standing desk or simply sit on a stool. Whatever works, the idea is to make it as easy as possible to move while you are hosting a live session.
You’ll also need to make sure you can be heard if you turn away from your laptop. For this, consider using a bluetooth headset with a microphone, or a clip-on mic with a long cable. Either way, be sure to do a test recording well in advance of your first class.
Final thoughts
Teaching remotely becomes infinitely easier in a customized space that gives you flexibility and room to be creative, while also limiting distractions for your students.
And bonus: while all the suggestions above will improve live sessions, they can also improve content you record ahead of time and share with students asynchronously.
Share your setup!
How have you set up your own space? Do you have any tips? If you would like to share your space with the teaching community, send me a photo at sgpowell@ryerson.ca.
Sally Goldberg Powell is an Instructional Technologist, eLearning at the Centre for Excellence in Learning and Teaching at Toronto Metropolitan University. She also teaches two first-year courses at Toronto Metropolitan School of Journalism.

For more tips, check out the Tech for Teaching page.